

If you want a festive fall party that’s easy to host, kid-friendly, and budget-conscious, a pumpkin decorating party checks every box.
There’s no need to carve (no knives, no goo), cleanup is manageable, and the activity is the entertainment.
Kids focus longer when they’re making something, and parents love leaving with a cute porch-ready pumpkin.
In this guide, you’ll get step-by-step setup ideas, supply lists, station plans, décor shortcuts, timelines, games, and smart ways to keep the total cost under control—even for a larger group.
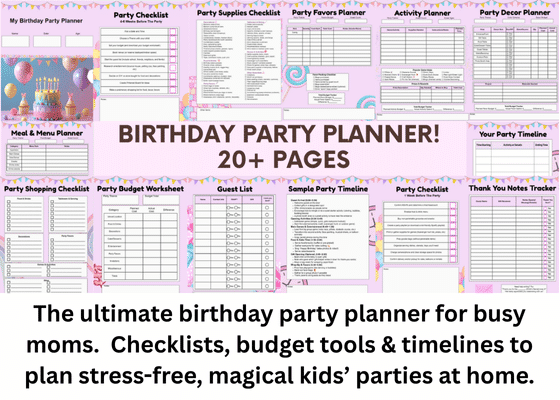
Planning parties on a budget all season? Grab my printable Birthday & Party Planner—timelines, shopping lists, budget worksheets and more. Brand-new hosts love it because every page tells you exactly what to do next.
What Age Range Is This Best For?
- Ages 3–5: Keep it simple with stickers, foam shapes, glue-on googly eyes, and washable paint daubers. Avoid small gems for choking hazards.
- Ages 6–9: Add paint pens, stencils, feathers, felt cutouts, pipe cleaners, mini hats, and glitter glue.
- Tweens & Teens: Offer acrylic paint, painter’s tape for geometric designs, metallic leaf sheets, hot-glue embellishments (adult help), and theme prompts (see below).
Pro tip: If you’re mixing ages, set up two zones—Little Pumpkins (washable, larger tools) and Big Pumpkins (paint pens, finer embellishments).
How Many Pumpkins Do You Need (and What Size)?
- One small pumpkin per child is standard.
- Add 10–20% extra for siblings or “oops” pumpkins (paint spills, cracks).
- For kids under 6, choose pie pumpkins (small and light).
- For older kids, sugar or field pumpkins with smooth sides take paint and stickers better.
Budget tip: Compare per-pumpkin pricing at Target, Walmart, local grocery stores, farm stands, and warehouse clubs like Sam’s or Costco. If you’re buying 15+, ask for a flat discount. (Find my article on Saving Money on Groceries here!)
No-Carve Pumpkin Decorating Station Ideas
Design your party around 3–5 stations. Kids rotate every 10–15 minutes, which keeps lines short and tables tidy.
1) Paint & Stencil Station (High-Impact, Low Mess)
Supplies:
- Outdoor acrylic craft paint
- Foam brushes + small detail brushes
- Paint pens (white, black, gold—these are the secret to crisp faces and outlines)
- Paper plates as palettes, water cups, paper towels
- Stencils: bats, cats, stars, polka dots, leaves, initials
- Painter’s tape for stripes and chevrons
How to run it: Tape a stencil to the pumpkin, dab with a foam brush, and peel. For neat stripes, wrap painter’s tape around the pumpkin like “pumpkin washi tape,” paint, and remove.
Quick themes:
- Classic Jack-O’-Lantern Faces (no carving necessary)
- Pastel Pumpkins (light pinks + metallic gold)
- Constellation Night Sky (navy paint + white splatter + star stickers)

2) Sticker & Foam Shape Station (Fast Wins for Younger Kids)
Supplies:
- Vinyl sticker packs (fall leaves, ghosts, letters)
- Foam shapes and foam letters
- Googly eyes (peel-and-stick if possible)
- Felt mustaches, witch hats, bow ties (pre-cut)
- Glue dots (stronger than school glue, less messy than hot glue)
How to run it: Show one sample pumpkin with eyes, nose, mouth, and a silly accessory. Kids can copy or invent their own characters.
3) Sparkle & Shine Station
Supplies:
- Glitter glue (squeezy tubes—no loose glitter required)
- Metallic paint pens (gold, silver, rose gold)
- Adhesive gems and sequins strips
How to run it: Keep wet supplies on one end, drying racks on the other. A cookie cooling rack or wire shelf makes a perfect drying zone.
4) Nature & Texture Station
Supplies:
- Leaves, acorns, mini pinecones
- Twine or ribbon
- Burlap strips, lace, raffia
- Mini wood discs for “buttons”
- Non-toxic craft glue or glue dots
How to run it: Show a sample “forest friend” pumpkin with leaf ears, a twine scarf, and acorn “buttons.” This is a brilliant low-cost station when pumpkins are pricey.
5) Costume Halloween Pumpkins
Supplies:
- Tiny witch hats, flower crowns, pipe cleaner glasses, felt capes
- Themed printables: vampire teeth, cat whiskers, superhero masks
- Elastic or glue dots to attach
How to run it: Offer 3–4 “recipes” on a stand-up card: Witch, Cat, Scarecrow, Superhero. Kids pick, assemble, and personalize with paint pens.

Party Theme Ideas
- Pastel Pumpkin Soirée: Soft pink, lavender, mint, and gold accents.
- Spooky-Cute: Black + orange + lime green, with googly eyes everywhere.
- Woodland Campout: Plaid tablecloths, burlap runners, twine bows, pinecones.
- Stars & Moon: Navy, silver, and white; constellation stencils; star confetti.
- Candy Shop: Bright colors, sprinkle stickers, candy-stripe ribbon.
Use the theme in napkins, tablecloths, and one backdrop. No need to theme every item—two repeating colors plus a simple banner look cohesive.
For more Fall birthday party ideas, I wrote an entire article on Fall Birthday Parties that you can find here!
What to Serve
You don’t need a full meal. A 90-minute art party runs perfectly on snacks:
- Savory: pretzel sticks, cheese cubes, crackers, popcorn, veggie sticks with ranch cups
- Sweet: doughnut holes, apple slices with caramel dip, chocolate-covered pretzels
- Drinks: apple cider (cold or warmed in a slow cooker), hot cocoa packets, water
- Allergy note: label everything; offer a nut-free treat bowl and gluten-free crackers.
Setup Timeline
One week out:
- Finalize headcount; buy pumpkins (or reserve with a farm).
- Order supplies (paint pens, stickers, glitter glue, tablecloths).
- Print station signs and sample photos.
Three days out:
- Pre-wash or wipe pumpkins so paint sticks.
- Portion stickers and embellishments into small bowls or caddies.
- Test one pumpkin so you know drying times.
Night before:
- Cover tables with disposable plastic or kraft paper.
- Lay out stencils, brushes, and napkins in sets.
- Prep a Drying Zone (wire rack + name labels).
Party day (1–2 hours before):
- Set up stations with one finished sample each.
- Fill water cups for brushes; place trash bins at each table end.
- Put snacks on a separate table to keep paint out of the dip!
Sample Floor Plan for Small Spaces
- Entry: Name tags + write child’s name on a painter’s tape strip to stick on their pumpkin bottom.
- Main Table: Paint & stencil (needs the most elbow room).
- Side Table 1: Stickers & foam shapes.
- Side Table 2: Sparkle & gems (closest to drying racks).
- Back Wall: Photo backdrop (balloon garland or paper fans) + finished sample pumpkins.
- Kitchen Counter: Snacks and drinks.
If you’re outdoors, clamp a plastic tablecloth to tables to prevent wind issues.
Budget Breakdown
Example for 12 Kids:
- Pumpkins: $2.50–$4 each = $30–$48
- Paint + pens + brushes: ~$25 (multi-pack paint pens are reusable)
- Stickers/foam/googly eyes: $15–$20
- Glitter glue + gems: $12–$18
- Table covers + cups + napkins: $10–$15
- Snacks + cider: $25–$40
Estimated total: $117–$166 ($9–$14 per child)
Ways to save: split bulk packs with another family, focus on 2–3 stations instead of 5, or ask each guest to bring one small pumpkin while you provide decorations and snacks.
Safety & Cleanup Tips
- Choose washable paint for ages under 6 and cover sleeves with art smocks or old T-shirts.
- Skip knives entirely; if you add hot glue, an adult should operate the gun at a side table.
- Keep baby wipes and a roll of paper towels at each station.
- Place wax paper or freezer paper under pumpkins as personal work mats—peel and toss.
- Label pumpkins on the bottom with painter’s tape and a Sharpie so the design isn’t ruined.
12 Decoration Prompts Kids Love
Use these as table cards.
- Starry Night (navy base, white splatter, silver star stickers)
- Silly Monster (one giant eye, crooked smile, fuzzy pipe cleaner hair)
- Pastel Rainbow (mint, blush, lilac stripes; gold dots on top)
- Kitty Cat (felt ears, whiskers, little bow)
- Vampire Grin (white teeth, widow’s peak hairline)
- Woodland Fox (orange paint, white felt chest, leaf ears)
- Confetti Party (dab paint with pencil eraser for perfect dots)
- Initial Pumpkin (tape letter stencil, paint, peel; outline with gold pen)
- Galaxy Swirl (marble acrylics)
- Harvest Plaid (painter’s tape stripes in two directions; peel for crisp pattern)
- Flower Crown (silk flower heads glued around the stem)
- Sports Team Colors (two-color stripes + logo sticker)
Print these on half sheets and stand them in mini frames so kids can choose a “recipe.”
Photo-Op Ideas
- Backdrops: paper fans, a balloon garland in your two theme colors, or a DIY banner reading “Little Pumpkins Workshop.”
- Props: chalkboard sign with “My Pumpkin Is…” prompts; mini straw bales; leaf garlands.
- Before & After: snap each child with a blank pumpkin and again with the finished masterpiece—parents love side-by-sides.
- Group shot: line finished pumpkins on the porch steps for an end-of-party tableau.
Party Flow (90 Minutes)
- Welcome (10 min): Name tags; kids pick a pumpkin and write their name on tape on the bottom.
- Station 1 (15 min): Paint & stencil
- Station 2 (15 min): Stickers & foam.
- Snack Break (10 min): Cider, pretzels, apple slices.
- Station 3 (15 min): Sparkle & shine or Nature station.
- Free Create (15 min): Kids revisit a favorite station.
- Show-and-Tell + Photos (10 min): Drying zone + porch lineup.
Favors That Double as Décor
- The pumpkin is the favor. Add a cute tag: “Thanks for making fall fun!”
- Mini paint pen (one per kid), leaf sticker sheet, or a hot cocoa packet wrapped with twine.
- Print a small “Pumpkin Care” card: “Let dry 24 hrs. Keep indoors or on a covered porch.”
Troubleshooting Common Party Pain Points
- Paint won’t stick: Wipe pumpkins with a damp cloth first; avoid glossy craft paint on waxy surfaces—use acrylic or add a primer base.
- Not enough drying space: Use muffin tins or cardboard egg cartons to hold pumpkins upright without smudging sides.
- Kids finish at wildly different times: Keep a coloring page or leaf-rubbing activity at a side table (crayons + paper).
- Glitter everywhere: Swap to glitter glue pens; they dry sparkly with far less mess.
- Sibling meltdowns over “the best” pumpkin: Buy two extra and keep them out of sight as backup.
Sample Shopping List
- Pumpkins (1 per child + 2 extra)
- Table covers (plastic or kraft paper) + painter’s tape
- Acrylic craft paint (white, black, orange, gold, accent color)
- Foam brushes, detail brushes, paper plates, water cups, paper towels
- Paint pens (white, black, metallic set)
- Stencils (letters, stars, bats, cats), painter’s tape
- Stickers (fall mix), foam shapes, googly eyes
- Glitter glue, adhesive gem strips
- Nature items (leaves, twine, pinecones)
- Felt sheets (black, orange, white), mini hats, ribbon
- Glue dots, craft glue (and hot glue gun for adults if using)
- Drying rack (wire shelf or cookie rack) + name labels
- Smocks/old T-shirts; baby wipes; trash bags
- Snacks + cider + small cups/plates/napkins
FAQ
Got questions about hosting your own pumpkin decorating party? Here are the most common ones parents ask before setting up their event!
How do you keep paint from peeling off pumpkins?
Start with a clean, dry pumpkin. Use acrylic craft paint (or a primer coat) and let it dry fully between layers. Keep finished pumpkins indoors or on a covered porch.
Do I have to provide the pumpkins?
You can ask guests to bring one pumpkin each and you provide decorations. Just mention size guidelines in your invite (small/medium, smooth sides).
What is the best adhesive for pumpkins?
Glue dots stick most embellishments without mess. For heavier décor, an adult can use hot glue. Avoid school glue on slick pumpkin skin—it slides.
What if I don’t want any paint at all?
Run a Sticker & Foam station only—vinyl stickers, foam shapes, googly eyes, ribbon, and glue dots can create adorable pumpkins with zero drying time.
How long should a pumpkin decorating party last?
Plan for 60–90 minutes of decorating time, plus 15–20 minutes for setup and a short photo break. Younger kids do best with a 60-minute activity window.
🎀 Ready to plan your next party the easy way?
Grab the printable Party Planning Workbook — timelines, checklists, and budgeting sheets all in one pastel-perfect planner.

0 Comments